Skip to content

Flow Studio: Getting Started

Welcome to Flow Studio! In this guide, we'll walk you through some initial steps to help you navigate and familiarize with Flow Studio effectively.


Login and Consent

When you first log in to Flow Studio App via the "Login with your Microsoft account" button on the home page (flowstudio.app), you will be directed to a login page where you can choose to login with either User consent or Admin consent. 

Login with Admin Consent grants Flow Studio App additional permissions, which is preferable if permitted by your organization.  This permission consent requires IT administrator to grant.

Login with User Consent requires permissions an end user can grant to Flow Studio without involving IT.  But in cases where stricter company policies are in place, approval from IT may also be necessary to access Flow Studio.  For further details, see More Information for IT Administrators.

Navigation Panel

On the left-hand side navigation panel, you'll find the following tabs:

  • Flows: Main tab for searching, sorting, editing, or restoring your Flows, including those from "Cloud flows" and "Shared with me" in Power Automate, and also those within solutions you own
  • Flows (Admin): View Flows with Power Platform Admin access, if you are granted the Power Platform Admin role
  • Power Apps: Access all Power Apps you have
  • Search: Search Flows not only by the Flow names but also by the actions inside the Flow. See article: Full Text Search with Flow Studio App
  • Migrate: Move multiple Flows between environments easily. See articles: How to Migrate / Deploy Flows from one Environment to Another and Advanced Tip for Flow Migration
  • Clipboard: Store frequently used actions in flows for easy access. See Clipboard & Flow Library
  • Export: Backup flows and export them to your computer in JSON. See details: How to Backup Flows in Bulk
  • Approvals: View all approval requests of your Power Platform
  • Connections: View all your connections in Power Platform. Click the + sign to expand and see all the flows utilizing each particular connection
  • Settings: View your license status and access to Customer Billing Portal
Flows tab

This grid is where most operations take place.

Header Column

Each column allows sorting and filtering:

  • Display Name: This column allows for more intricate filtering options (such as contains/and/or). You can also utilize the Search box for instant searches based on flow names. Additionally, clicking on Display Name enables sorting in ascending or descending order
Screenshot 2024-03-06 100055
  • Runs: visualization of recent runs, with the most recent on the left. The graph depicts the duration of each run (height of the bar) and its status—successful, failed, or canceled—indicated by bar color (green, red, and grey, respectively). Remember to refresh runs manually by clicking Refresh Runs.
Screenshot 2024-03-13 195736
  • Tag: Categorize your flows conveniently by attaching tags. Use the Tag column to filter or sort related flows effortlessly
  • Trigger: Filter or sort flows based on trigger type, including Recurrence, Request, Open API Connection or Webhook
  • #Action: Displays the number of actions in your flow's definition, indicating its complexity—the more actions, the more intricate the flow

You can customize the columns by showing or hiding them using the Columns Control button


Multi-select, Bulk Actions and Export Excel

Click on Multi-select to activate the selection box column. Select multiple Flows and perform bulk actions such as enabling/disabling them by clicking on the corresponding buttons.

Screenshot 2024-03-06 103246

When multiple Flows are selected, clicking on the Edit JSON button will open multiple tabs of the selected Flows in JSON format for editing.

The Export Excel button will generate an Excel file of the flow grid and export it to your Download folder.


Flow Action Menu

Hover over a Flow and right-click to access the action menu:

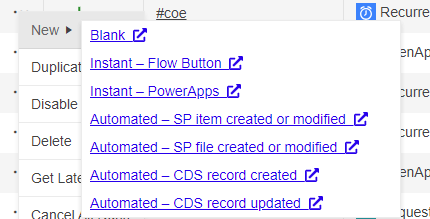
 New ▸: Create a new flow with frequently used triggers


Edit JSON: Open your Flow in JSON format in a new tab, allowing direct modifications. Many users find editing in JSON easier than using the Power Automate Designer, especially for complex expressions

Edit ↗️: Navigate to the Power Platform's Edit page for your Flow

Edit in Designer: Launch an embedded Designer to edit the Flow within Flow Studio

Snapshots: Revert a flow to a previous state. More details: Restore Power Automate

Flow Diagram: Create a Mermaid diagram to document your flow. This is an easy process for those who needs to frequently create technical documents. See Flow Diagram

Duplicate: Duplicate the selected Flow

Disable/Enable/Delete: Disable/enable/delete the selected Flow(s). These can be used as a bulk action

Run Now: Run the selected Flow. This option only appears for manually triggered Flows

Cancel All Runs: Cancel all current runs of the selected Flow

Get Latest Runs: This feature generates a new tab listing the recent runs, allowing you to delve deeper into any errors. You can also export the run history to Excel by clicking the Export Excel button

Tag: Add tags to Flow for easy organization and sorting


For additional Learn articles, explore: